Warehousing Web

• Open the Microsoft Edge browser  and copy the warehousing link into the search field. Sample link -> wh-sample.inntact.ch
• Login with your credentials (see page 7).

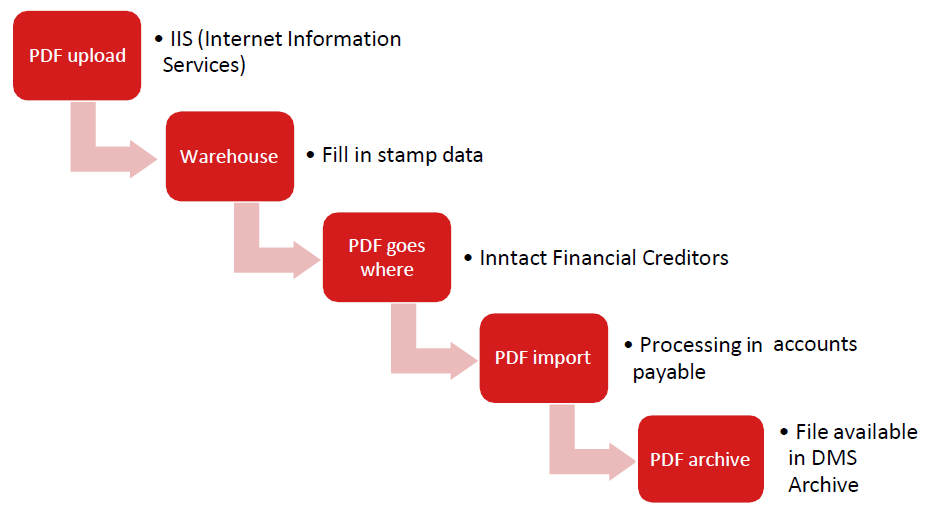

PDF Upload
• A path is set up in IIS (Internet Information Server)
• PDFs are copied to this directory (C:\inetpub\wwwroot\warehousing\docs\warehouse)
• All PDFs located in this directory are visible
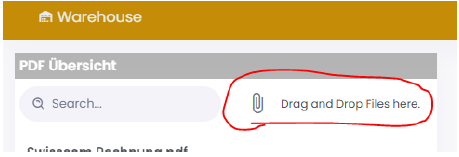
• User can also drag and drop the files directly in warehouse webApp.
Warehouse
• Fill out/add the stamp (see details on page 6)
PDF goes where?  Transfer → Accounts Payable (Button)
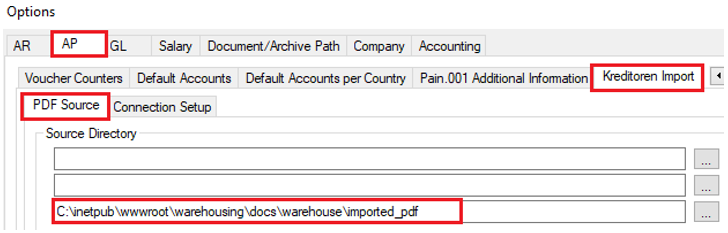
• PDF is moved to the upload path
• Path is defined under Financial – Options – AP – Kreditoren Import – PDF Source
 Sample upload path shown below:
• PDF is now available in Accounts Payable under PDF
Creditor PDF
• PDFs from Warehouse are available via source path
• PDF is read, supplemented and saved
E-archive
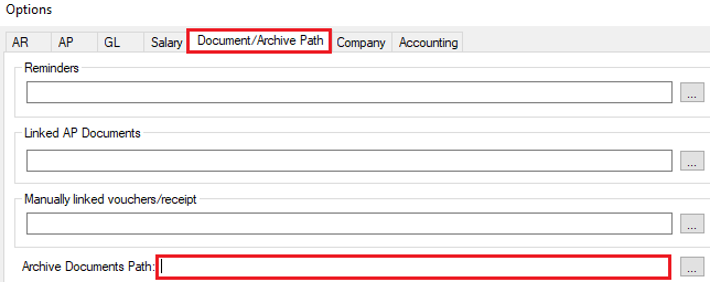
• Book Supplier Invoices (AP) → GL, the PDF is copied to the archive path
• Archive path is defined under Financial – Options – Documents/Archive Path
• Note that E-archive is a licensed feature, only then the archive path is shown.

• Links: PDF overview (everything that was stored in the IIS path)
• Middle: PDF page view
• Right: PDF Editor (stamp)
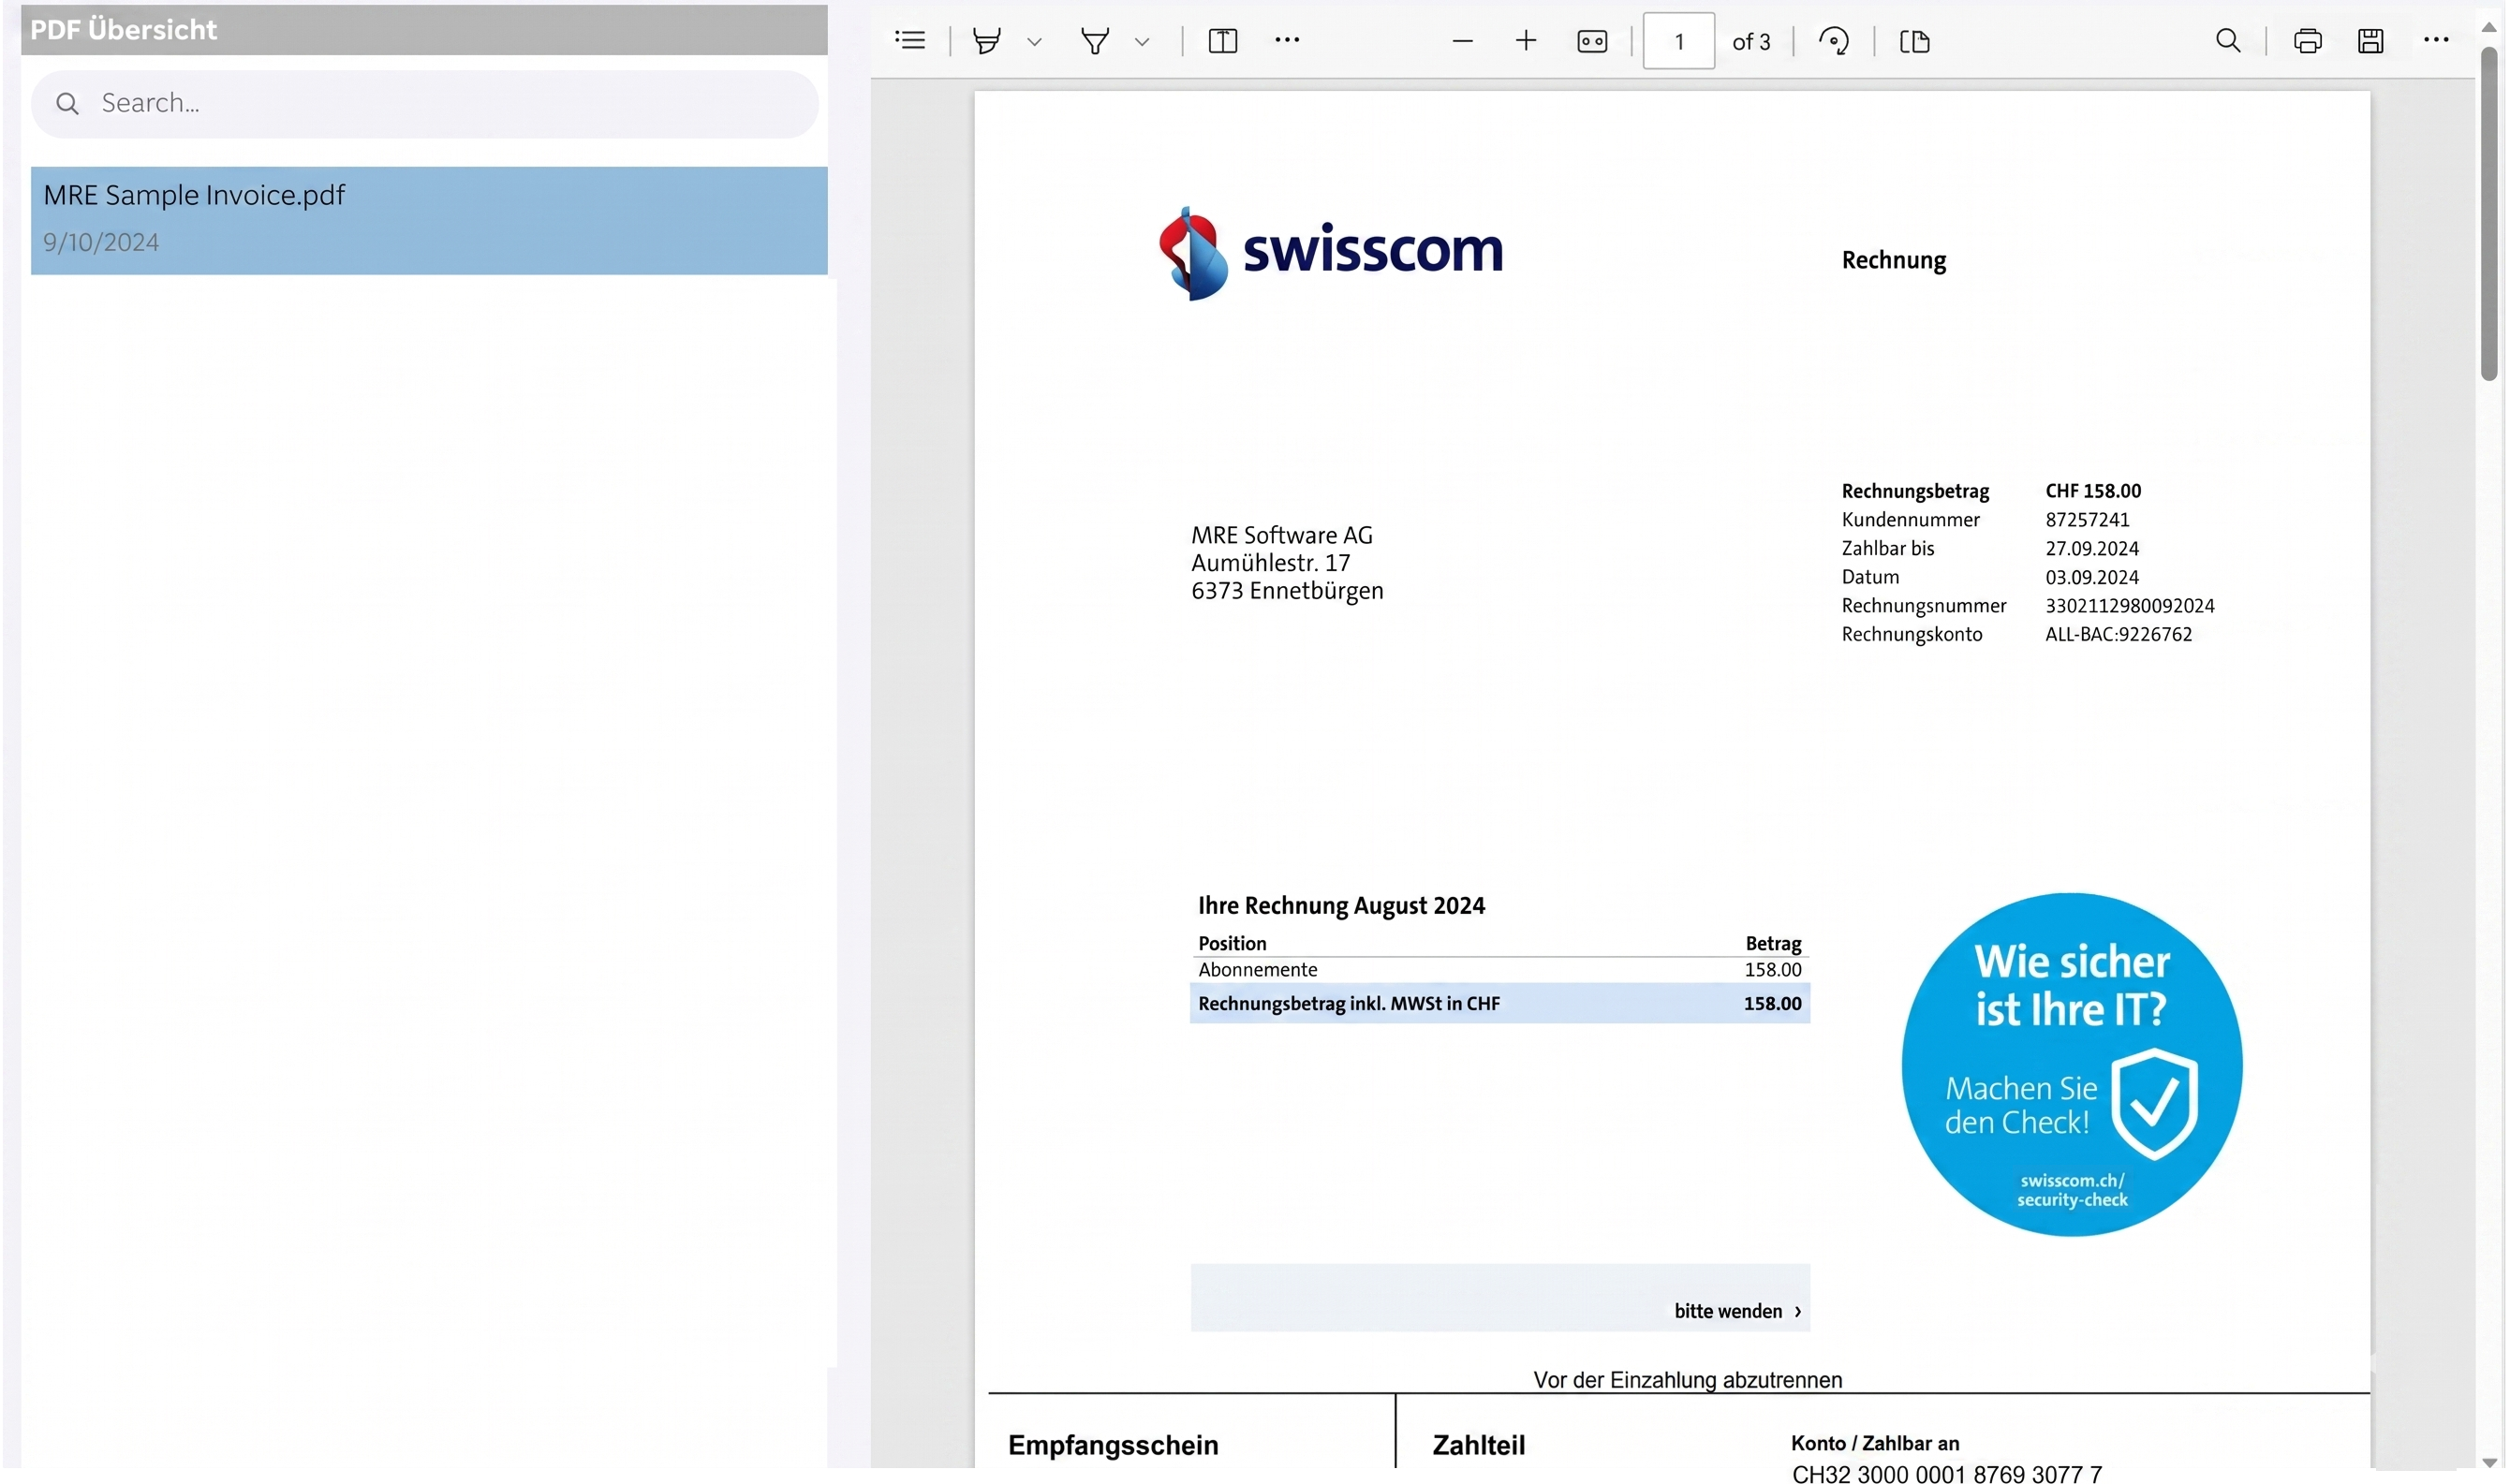
I. STEP - 1
PDF overview → select supplier invoice → PDF view
II. STEP - 2
Add notes or markings to
PDF using Edge functions

1. Highlighting with a highlighter
2. Character function
3. Add text
4. This information is saved via EDGE save (symbol on the right)
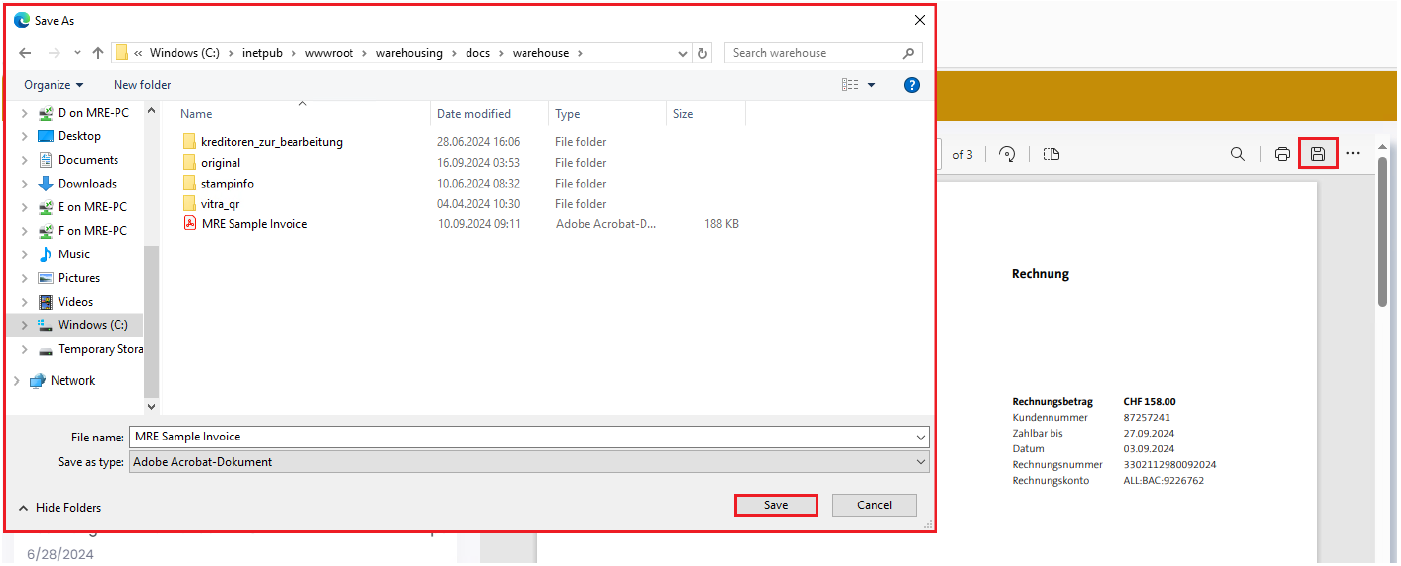
- simply select Save (PDF name should be correct)
5. This must be done before adding the stamp.

III. STEP - 3
 Select and edit the desired invoice.
• The work steps of numbers 1 – 9 are described below.
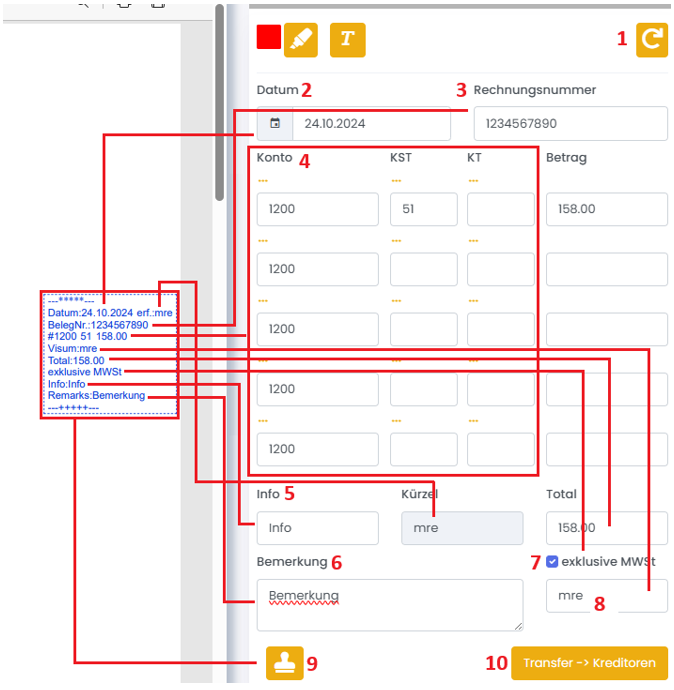

1. UNDO
• You need this field to undo everything.
2. DATE
• Link to AP field  Booking date
• Field is required (not possible to add stamp if field is empty)
• Message is shown.
3. INVOICE NUMBER
• Link to AP field  Supplier Voucher.
• Field is required (not possible to add stamp if field is empty),
• Message is shown.
4. ACCOUNTING INFORMATION (5 lines available)
• ACCOUNT - AP field  Debit Account
• KST - AP field  KST
KST
• KT - AP field  KT
KT
• AMOUNT - AP  Total
Total
• Field is not required (possible to add stamp if field is empty)
5. INFO
• AP Field  Info
Info
• Field is not Required (possible to add stamp if field is empty)
6. REMARK
• Important comments/notes can be added here
• Field is not Required (possible to add stamp if field is empty)
7. Exclusive of VAT
• The amount will then be used exclusive of VAT.
• Field is not Required (possible to add stamp if field is empty)
8. VISUM
• Selection for VISUM
• Field is not Required (possible to add stamp if field is empty)
9. RUBBER STAMP
• Use this button to add the stamp information to the PDF.
10. TRANSFER  CREDITORS
• As soon as you press this field, the delivery invoice will be available in inntact Accounts Payable.
11. Warehousing WEB Inntact AP Import Approval documentation is available here:
 Other fields such as abbreviation and total are filled in automatically:
• Abbreviation - based on the logged in user
• Total - Automatically calculated (of the total price) based on the «AMOUNT» field.


• Customer must decide who will purchase the domain url/link to use and where to host (IIS) the application.
• If application will be hosted within customer’s IIS, it’s important that SQL Server (inntact DB) should be within the same network with the IIS.
• Once above is known, setup can follow.
• Otherwise, MRE can setup everything from domain to hosting.

• Customer must provide the ff. user details.
- Full name
- Email address
• MRE can create the login details.